
A couple of weeks ago, I had a dream with some cinnamon rolls. In the dream, I baked a batch of rolls that iced themselves. Like, they came out of the oven with a layer of creamy, and melty cream cheese icing. I woke up determined to make something like that, and finally got to it yesterday. These aren’t self icing cinnamon rolls but they are extremely delicious!

This was my second attempt at making cinnamon rolls and the process went so smoothly. My first attempt, with a different recipe, was a sticky mess. The filling was supposed to be mixed with margarine; which made the filling/rolling very messy, the dough was ridiculously sticky, and the rolls unrolled before they even made it to the pan. Since this experience, and my dream, I set out to try again.
The recipe, from the lovely Lynna at Hearts in My Oven, is a simple but lengthy project. These rolls require two rises, one after making the dough, and the other after the rolls have been formed. Each rise is for two hours. I know, such a long wait! Trust me, it is definitely worth it.
The dough is simple and comes together quickly, even faster if you’re armed with a stand mixer. I am not, so I kneaded this dough by hand. I have to say, this is one of the parts I am most proud of. When I usually make any yeasted dough, I give in and add more flour while kneading to get to the desired result faster. This always ends up backfiring on me because there’s a reason why yeasted dough recipes call for a certain amount and only that amount of flour. Kneading helps develop the gluten that make bread deliciously airy and fluffy. Adding more flour while kneading can lead to a tough end result. Believe me, I know. While I was tempted to add more flour, I restrained and kept kneading. I kept going and going, until the dough became a smooth, lump free, unsticky mass. It happened right before my eyes!


After resting for two hours, it was time to roll out. At this point, I was kind of nervous. I kept remembering the sticky mess I had the last time I attempted something like this, but I knew this time was different. I laid out my dough and begin to roll. For the first time ever, the dough rolled out with zero stickiness and cooperated with me! So much so, I rolled it out a lot bigger than what the recipe called for!


After laying out the cinnamon sugar filling, it was time for the next nerve wracking part: rolling. This was where things usually got messy but it came together pretty cleanly! Now, I was just internally screaming with excitement. To cut the rolls, you need unflavored floss. I was a little skeptical at first but this is key to this recipe. Sliding the floss under the roll, you cross and yank the floss at the top to cut out a roll. This method results in a clean cut that does not smush your rolls into oblivion, and keeps the sugar filling in place.


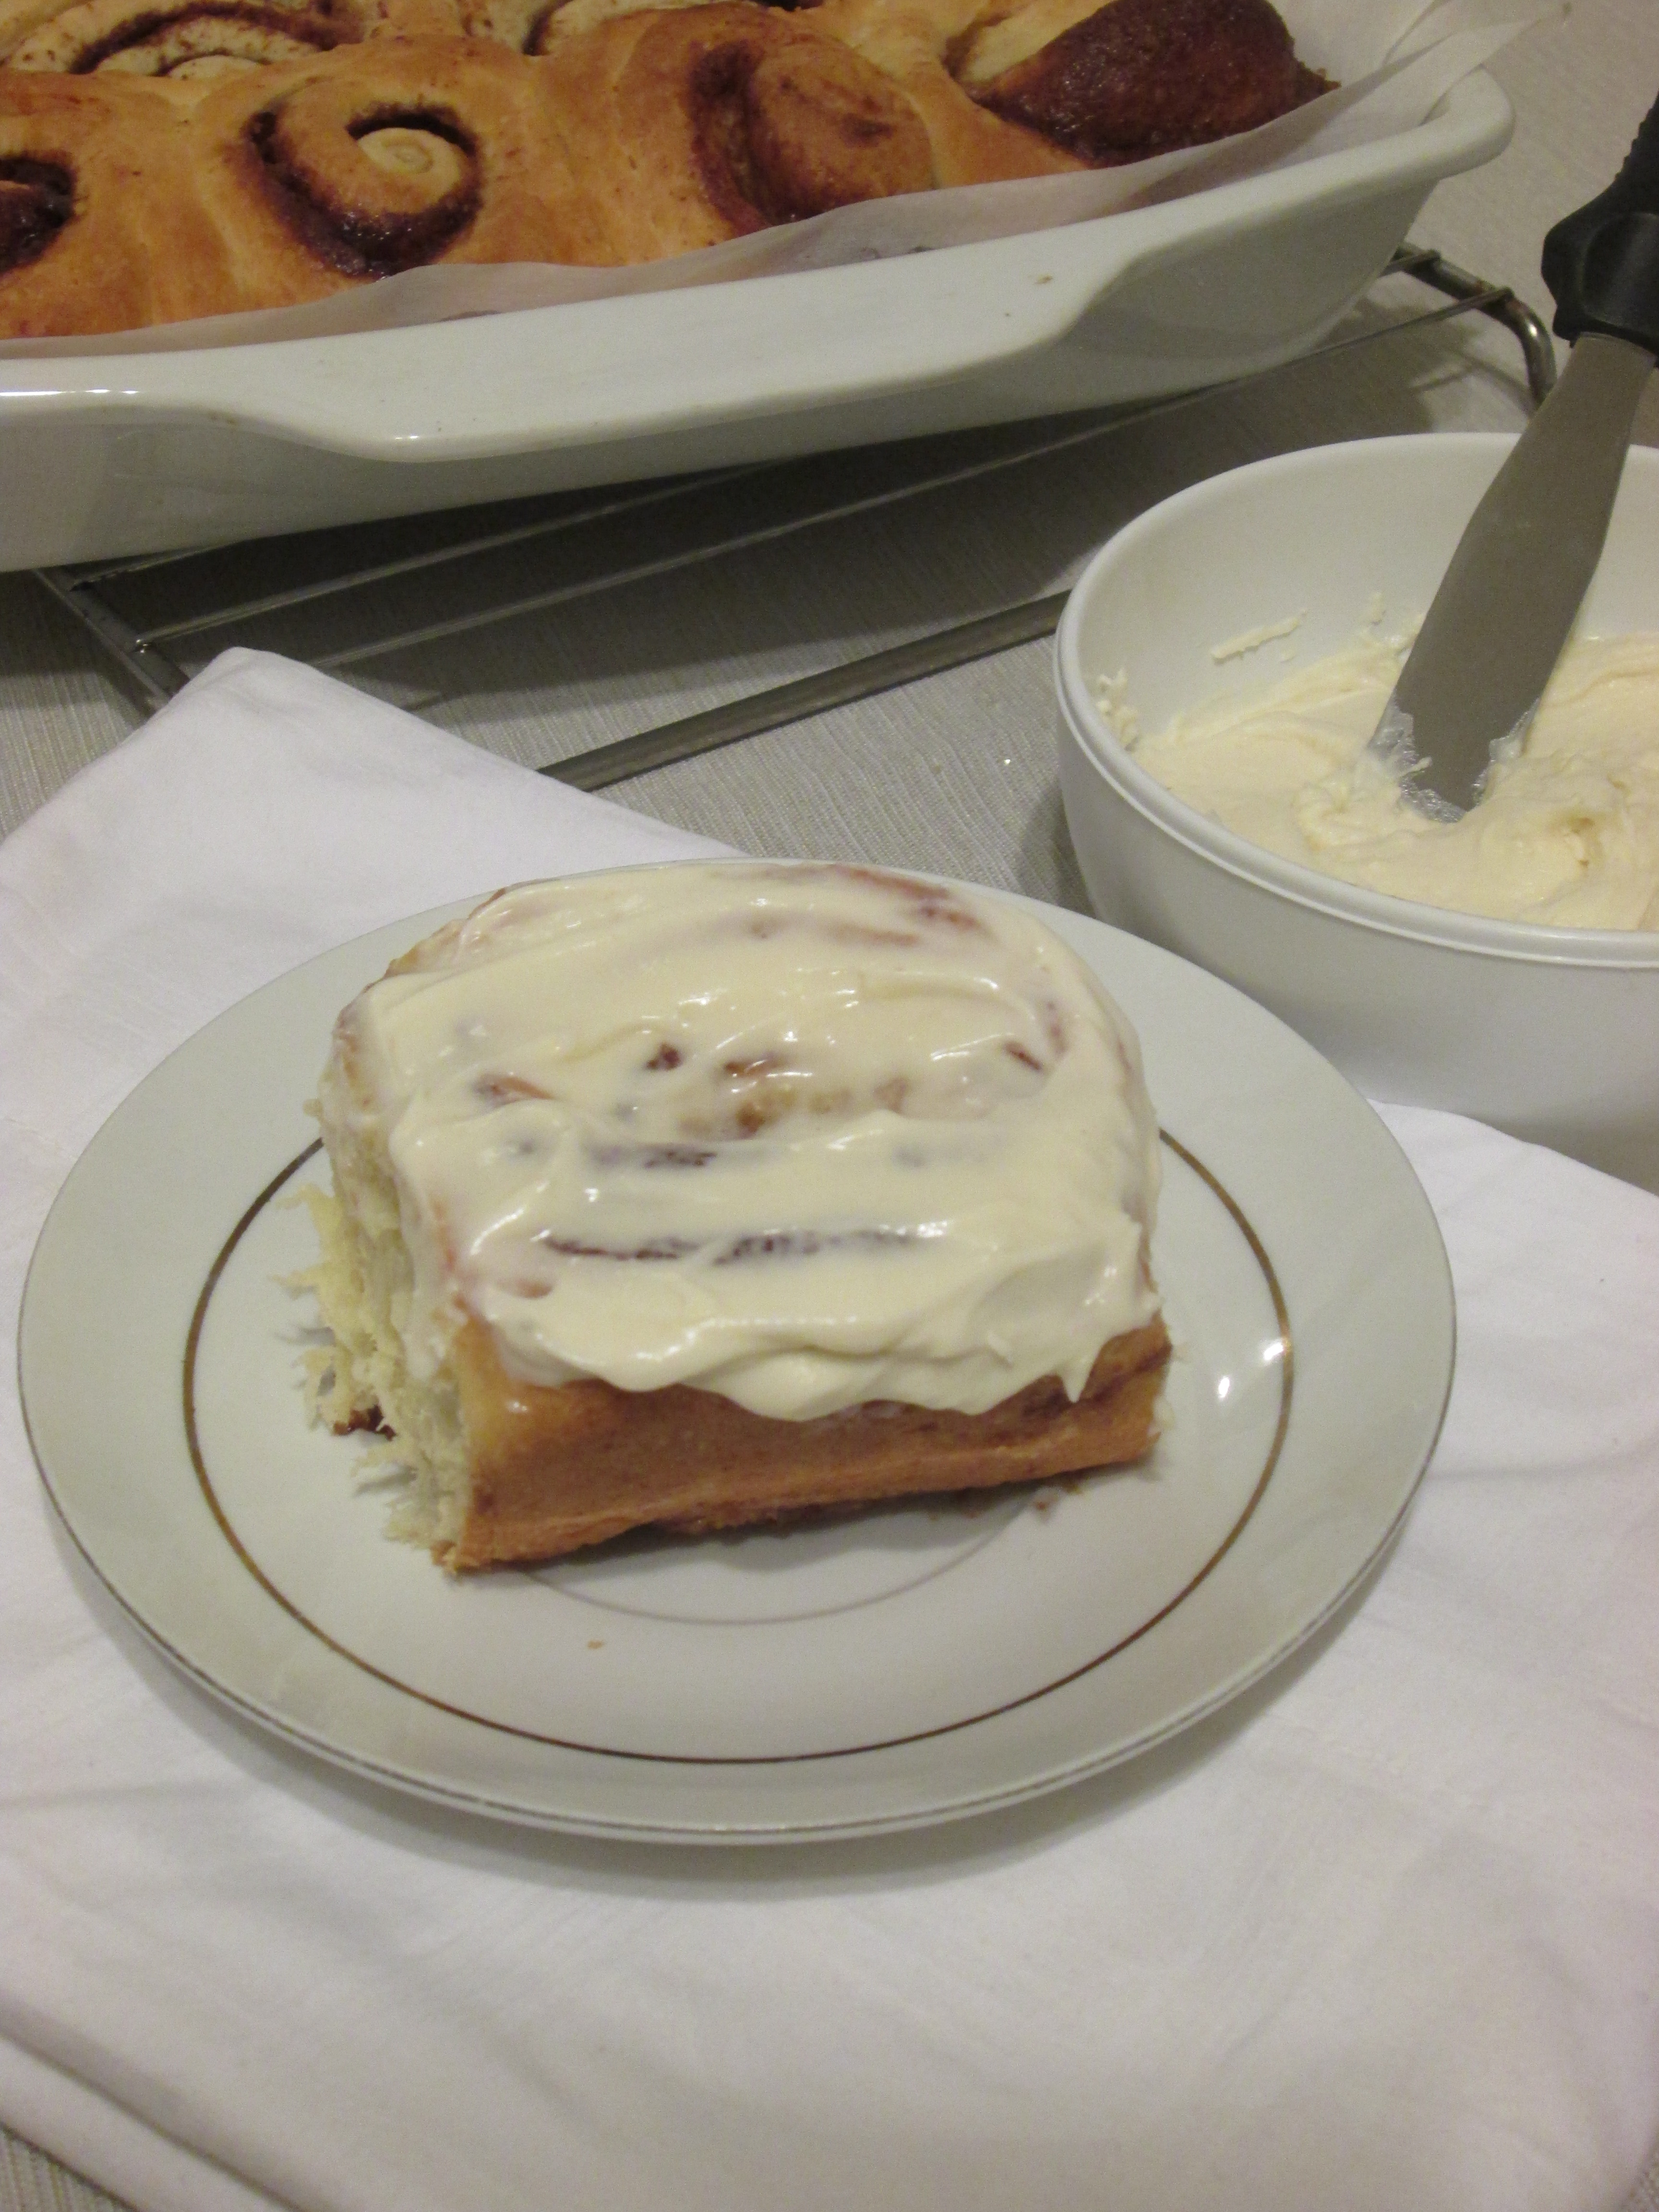
Now, the original recipe yielded a dozen. I got 20. I rolled out the dough into a bigger rectangle, which resulted in more rolls. No matter how big you roll this dough, the result is a very fluffy, lightly sweetened roll with a huge punch of cinnamon flavor. I used Martha Stewart’s classic cream cheese frosting to ice a few of these, which really set it over the top. The tangy sweetness of the frosting hits the airy cinnamon roll just right. Make these rolls for this long weekend, I swear you won’t regret it!
Cinnamon Rolls – Adapted from Hearts in My Oven
Makes about 12 rolls (more if you roll you dough into a larger rectangle)
Dough:
- ½ cup of milk
- 8 tablespoons (1 stick) unsalted butter
- ½ cup of warm water (110°F)
- 2 ¼ teaspoons (one packet) Active dry yeast
- ¼ cup of granulated sugar
- 1 large egg
- 2 large egg yolks
- 1 ½ teaspoon of salt
- 4 ¼ cup of all purpose flour , divided
Filling:
- ¾ cup of brown sugar, packed
- 3 tablespoons of ground cinnamon
- 1/8 teaspoonof ground nutmeg
- 1/8 teaspoon of salt
- ½ tablespoon of unsalted butter, melted
Directions:
- Proof the yeast: sprinkle the packet of yeast over the half cup of warm water and set aside for 10 minutes, or until foamy.
- In a small saucepan, heat milk and butter until the butter is completed melted. Remove from heat and let the it cool down until about 100°F.
- In a large bowl, whisk together the water, yeast, sugar, egg, egg yolk until combined. Alternatively, you can use your stand mixer with the paddle attachment.
- Next, add the salt, milk mixture, and 2 cups of flour into the mixture until blended.
- Switch to a rubber spatula or wooden spoon, and add 2 cups of flour. Knead by hand until its smooth and not sticking to the sides of the bowl anymore, for about 15-20 minutes. Switch to your dough hook at this step, if using a stand mixer.
- In a large metal bowl, lightly oil bottom and sides of the bowl. Make the dough into a ball and transfer to bowl. Cover the bowl with plastic wrap and set it in a draft-free spot (such as your unheated oven), until dough doubles (90-120 minutes).
- While the dough rests, make the filling. In a medium sized bowl, mix the lightly packed brown sugar, cinnamon, nutmeg, and salt. Set aside.
- When the dough is doubled, lightly flour a clean work surface. Transfer dough and press it down. Roll the dough into a 16x12inch rectangle with a lightly floured rolling pin, with the long side of the rectangle facing you.
- Lightly brush the dough with melted butter. Evenly sprinkle the filling on top and pat down gently into the dough with the palm of your hand.
- Starting from the long side closest to you, roll towards the opposite end as tightly as you can. Use either a little bit of water or melted butter to seal the ends. Pinch edges to seal.
- Line the bottom of a 13x9inch baking pan with parchment paper. Using a unflavored string of floss, cut the rolls into 12 equal pieces. (Slide the floss under the roll and wrap it around the roll to cut/slice.)
- Place rolls, cut side up in baking pan. Cover pan with plastic wrap and set it in a draft-free spot, until dough doubles in size (90-120 minutes).
- Once rolls are doubled in size, preheat your oven to 350°F. Bake rolls for 25-30 minutes, or until tops are lightly golden brown.
- Let rolls sit in pan for about 5 minutes before removing to a cooling rack to cool down. Spread cream cheese icing on top after cinnamon rolls have cooled for at least 15 minutes.
Cream Cheese Frosting – adapted from Martha Stewart
Makes about 2 cups
- 8 ounces cream cheese, room temperature
- 8 tablespoons (1 stick) unsalted butter, cut into pieces, room temperature
- 1 cup confectioners’ sugar, sifted
- 1 teaspoon pure vanilla extract
Directions:
- Place your softened cream cheese and butter into a medium mixing bowl. Using an electric hand mixer, beat together the butter and cream cheese until smooth and fluffy. Add in your sifted confectioners’ sugar in stages, to avoid lumps, until completely incorporated. Add the vanilla extract, and stir to combine.
Lucy’s Tips:
- I made about half of the frosting recipe, as I did not frost all of the rolls.
- The ends of the rolls may not have any sugar filling. You can discard these or bake them anyway. Make sure the filling is spread out completely before rolling to avoid empty end rolls.
- Store your cooled rolls in an airtight container. For the frosted rolls, I recommend you stick them in the fridge because of the cream cheese in the frosting (it can possibly go bad if left outside). They taste awesome microwaved for about 30s on high the next day!

