
Meringues have always been one of my favorite mystery kitchen experiments. I never really understood how or what was required to make these yummy things, or how simple it actually is. My first tastes of meringue were courtesy of traditional Dominican desserts. Our birthday cakes are covered in meringue frosting, similar to seven minute icing. It is soft, fluffy, super sweet and resembles marshmallow fluff. When the cake is left out for a couple hours, the frosting begins to harden and form a bit of a crunchy shell. The longer it sat out, the crunchier it’d get. The thick layer of frosting helps preserve the cake layers underneath; keeping the cake relatively moist. As an adult, it’s still my favorite part of Dominican cakes. Sometimes, I collect my parents’ and sister’s leftover frosting off their pieces of cake and refrigerate it for a couple days so some of it would harden; giving me a mix of soft, fluffy frosting with tons of crunchy bits.
These days, the only way I can get my meringue fix is if I make them myself. This was definitely a kitchen experiment to me. I’ve played around with meringue several times before but never made the actual meringue cookie. For this batch, I used Food52’s non-recipe to make my meringues. I had one egg white sitting around my fridge that needed to be made into something. This non-recipe uses ratios to figure out how much of each ingredient is needed to make consistent meringue cookies, depending on how many whites you have.
The ratios are: 1 part egg whites: 2 parts sugar: .5 parts (in tsps) cream of tartar
My amounts were: 1/4 cup of egg whites (from two whites): 1/2 cup sugar: 1/8 tsp cream of tartar.
Sounds simple and straightforward, right? Well, the difficulties (if any) lie in the method. The egg whites must be room temperature before whipping to soft peaks. Before you even do that, you have to make sure your bowl and beaters are completely grease free. Feeling skeptical? Wipe your tools down with a small amount of lemon juice before whipping.
Before beginning, preheat your oven to 225F, and arrange your oven racks in either the lower and upper thirds of the oven or place one rack in the center. Low temperatures are crucial for meringues; don’t try to hike it up so they’ll be done quicker. Your patience will be rewarded.
Pour your whites in your grease free bowl with the cream of tartar and whip away with your beaters. You’ll notice how bubbly the mixture gets as you whip. For this method, the whites need to be whipped to soft peaks. What does this mean? A soft peak means that when held up, the whites can’t hold the peak. Turn off your beaters and dip them straight down into the bowl. Lift them up and turn the beaters over. The egg whites on the tip of the beaters should be soft, airy, and begin to lose their form the longer you have the beaters facing up.

At this stage, we’re ready to gradually add the sugar. Start by adding in the sugar, while beating, by the tablespoon. Incorporate the sugar for about 10 seconds before adding another tablespoon. Keep going until all the sugar is completely incorporated. Turn your beaters on high and beat the whites into submission. The whites will have turned into meringue, thanks to the addition of the sugar. You’ll notice the mixture is now glossy, thick and slightly heavy. Continue beating until you have stiff peaks; meaning the meringue holds the peak when held up.


After you’ve reached this point, add your flavorings. I added about 1/2 teaspoon of vanilla extract to this batch but the sky’s the limit. You can add zest to make lemon, lime, or orange meringues. Mint, almond, or coconut extracts to make flavored meringues. You can also add melted semisweet chocolate to make chocolate meringues! The options are endless.

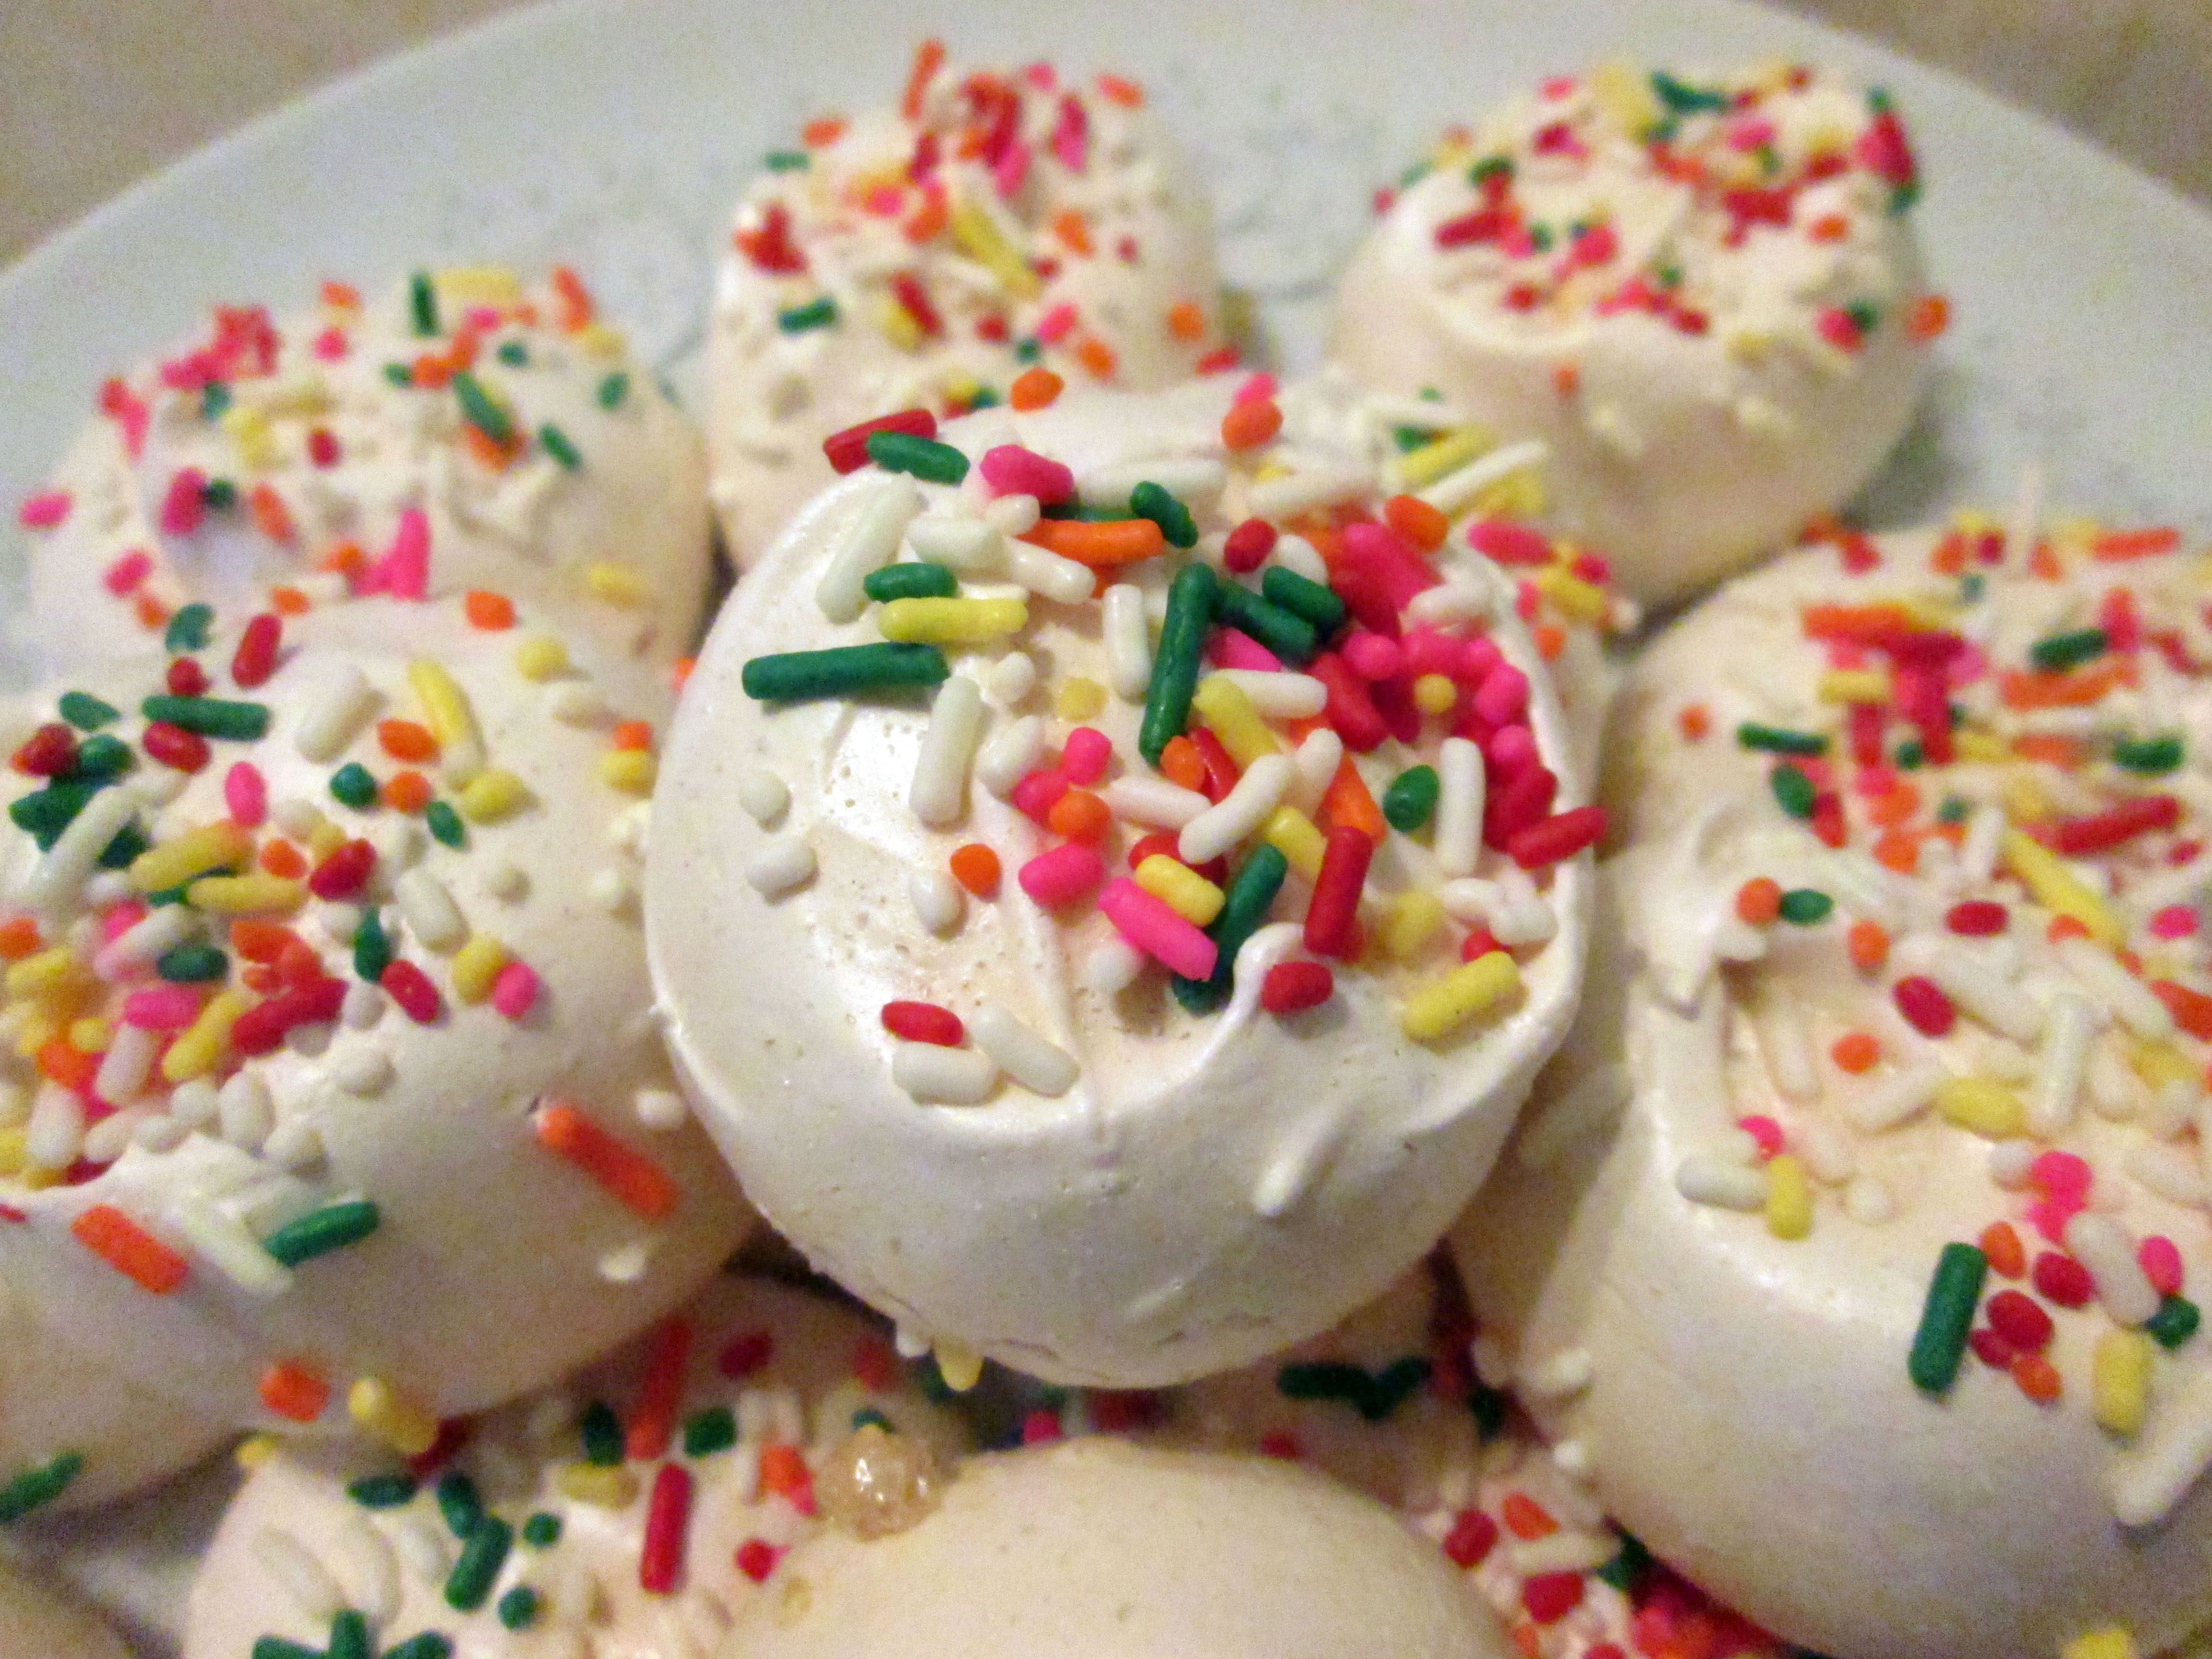
Now that you have your meringue, it’s time to portion them out on a lined baking sheet. You can portion out your cookies with two spoons, a piping bag, or attempt to use a disher, like I did. It went pretty well but after a few cookies, the meringue didn’t want to come out of the disher. I coaxed them out of the disher with a spatula and continued to portion them out. I topped mine with some sprinkles but it’s totally optional.


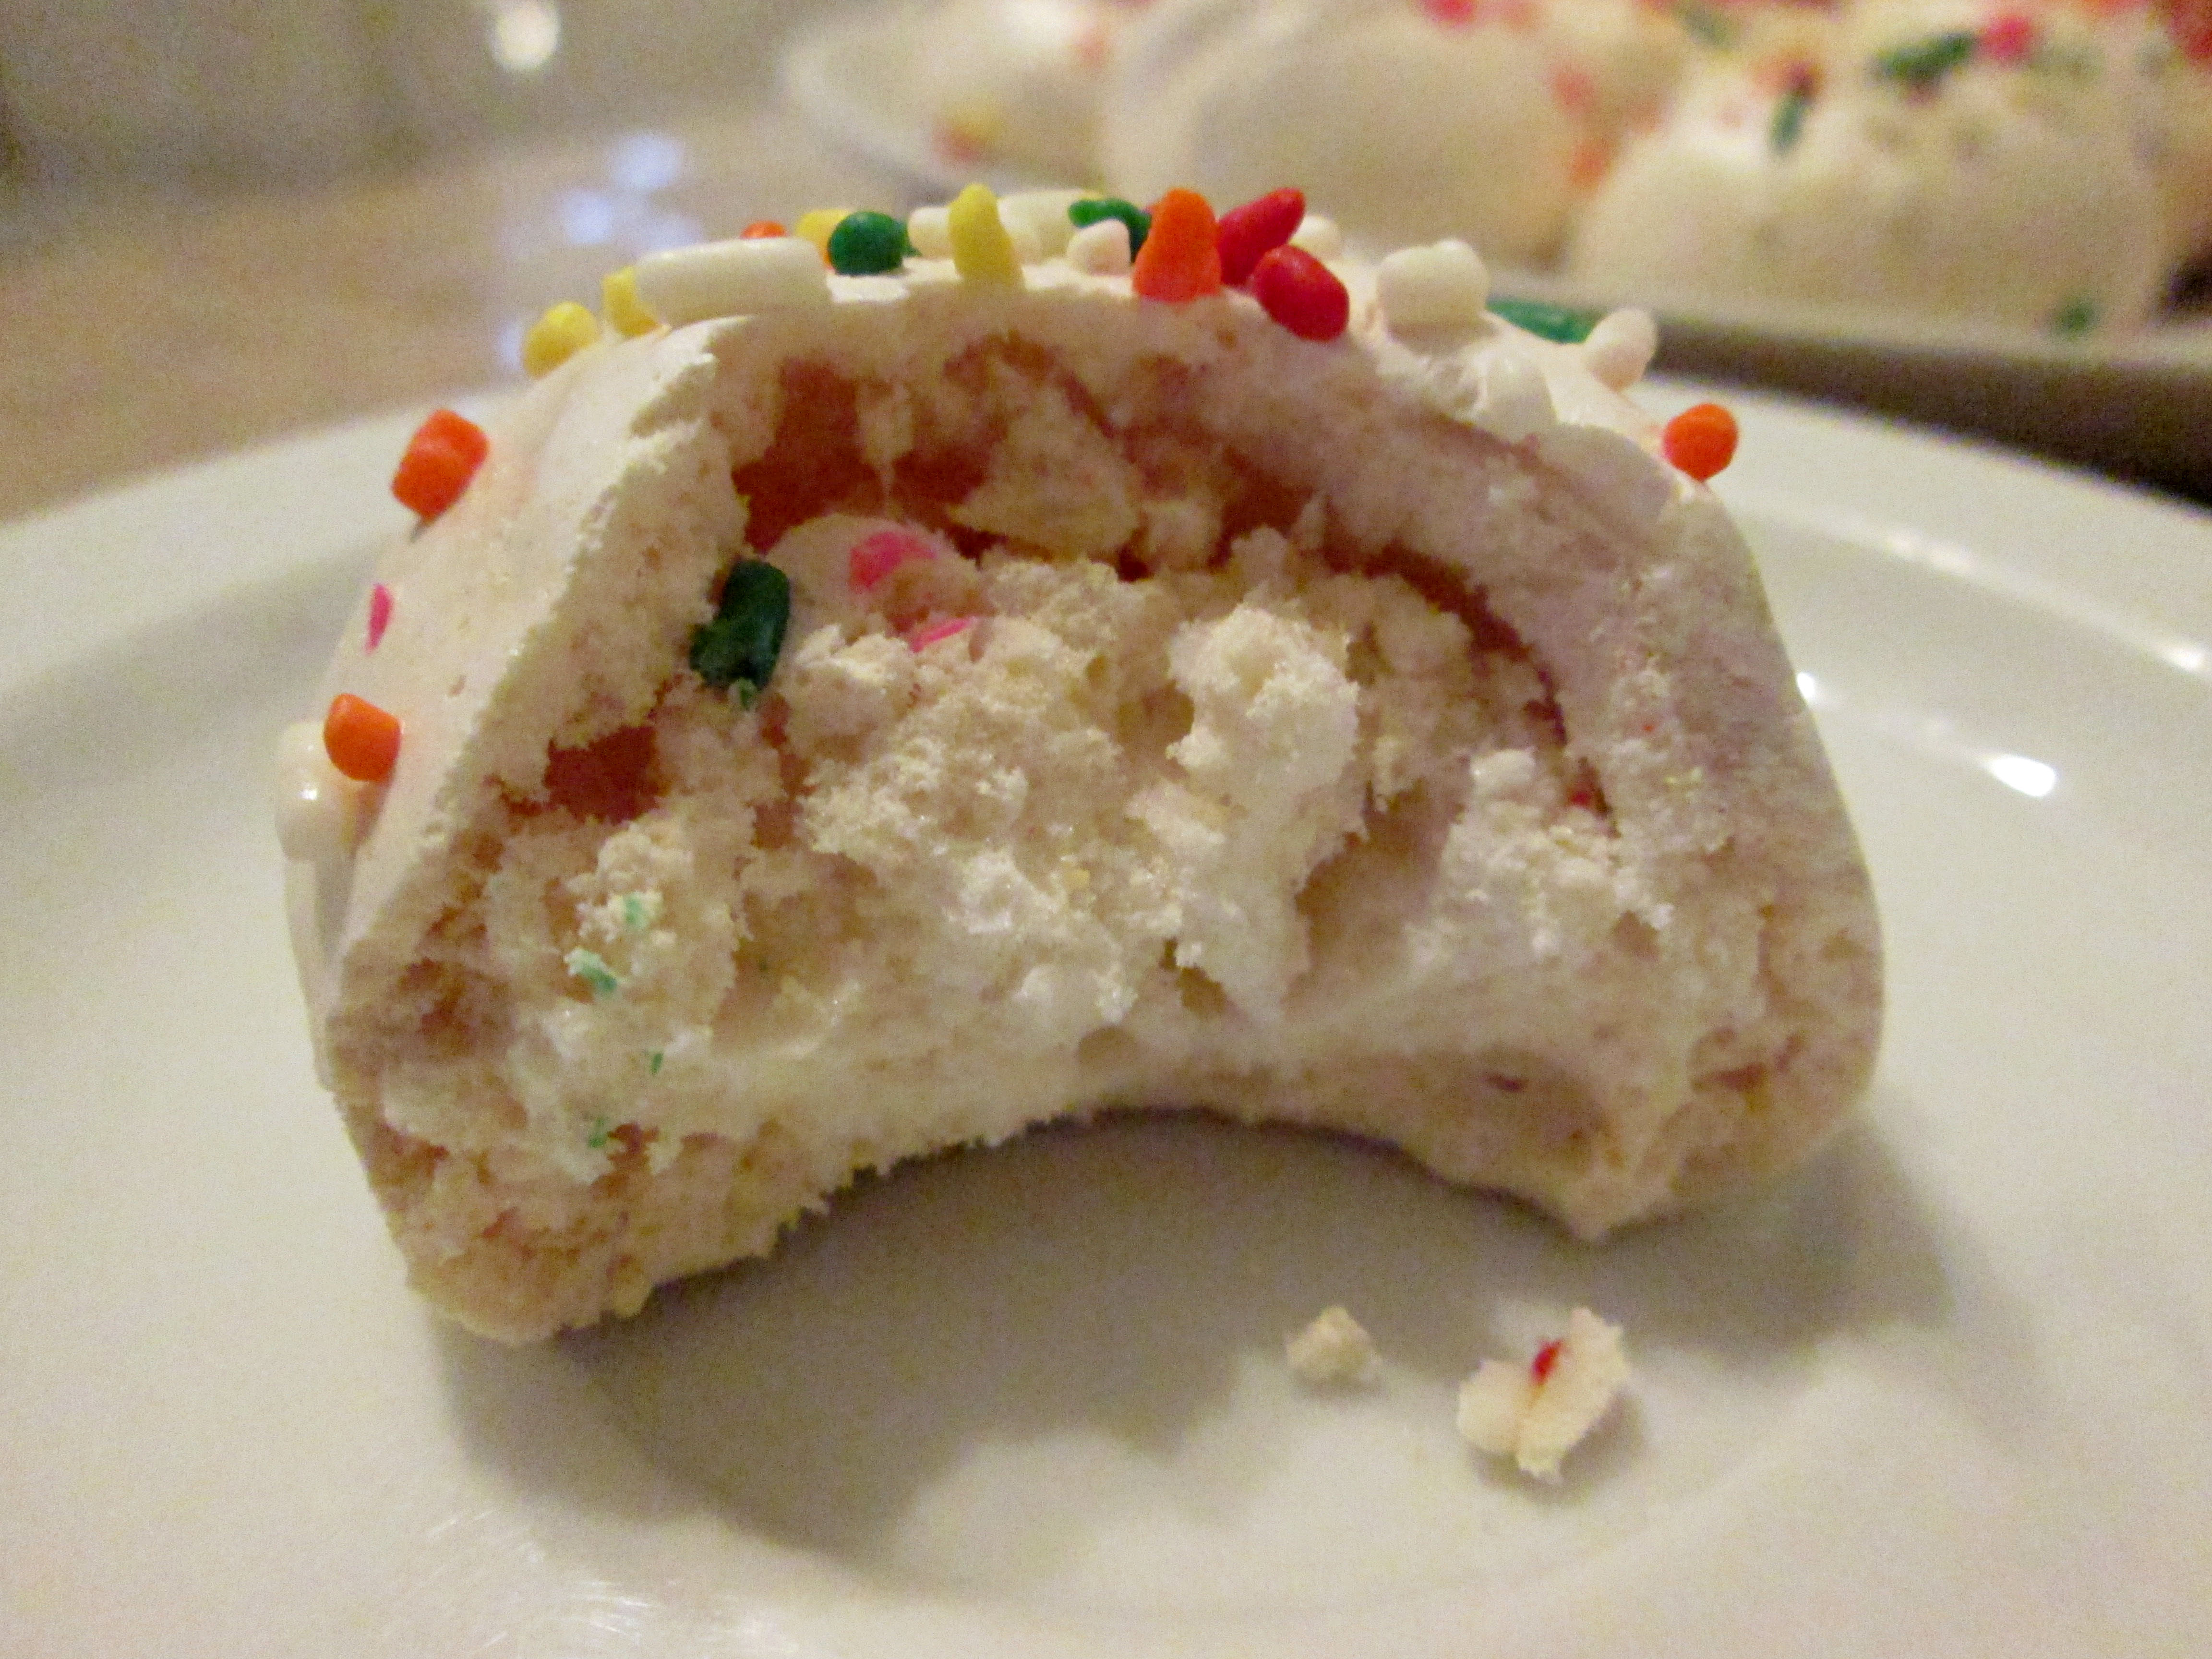
Once all portioned out, place your baking sheet in the preheated oven for 1 1/2 – 2 hours. Yes, you read that right. This is by far, the hardest part of the recipe. I know it’s such a LONG TIME but the wait is worth it. The oven’s low temperature gently coaxes out the meringues’ moisture, leaving a crunchy, melt in your mouth cookie.

You’ll notice that the finished meringues’ shine has dulled and that they are super light in weight. That dull exterior is hiding a crunchy and sweet interior that tastes like vanilla flavored air. Weird description but I feel like meringues are what marshmallows would be if they ever got completely hard.
Now that I know how easy it is to make these, my favorite cookies won’t be out of reach anymore. I can now experiment with different flavors and make as many or as little as I want!
Meringues Without A Recipe – adapted from Food52
Makes approximately 19 meringues
- 1/4 cup of egg whites (from two whites), room temperature
- 1/2 cup sugar
- 1/8 tsp cream of tartar
- 1/2 tsp vanilla extract
Directions:
- Preheat your oven to 225F. Line a baking sheet with parchment paper. Place your oven racks in either the lower or upper thirds of the oven (for multiple sheets) or in the center of the oven (for one sheet).
- In a dry, clean, medium sized mixing bowl, beat the whites and cream of tartar with an electric mixer until foamy and can form soft peaks.
- Gradually add the sugar, by the tablespoon, waiting about 10 seconds before adding another spoonful. Continue beating until all the sugar has been incorporated and the whites are stiff and glossy.
- Add the vanilla (or other flavorings) and beat to incorporate. Drop the meringues onto the prepared sheet either with a piping bag, a set of spoons, or a disher.
- Bake your meringues for 1 1/2 – 2 hours, rotating the pan(s) halfway through baking.
- Turn the oven off and cool the meringues inside the oven until completely cool. Meringues should come off the parchment cleanly. Place in an airtight container to prevent softening.
Lucy’s Tips:
- Egg whites are best separated cold but whip better when warm. Separate your eggs straight out of the fridge but leave them on the counter for an hour or so, until it’s room temp. In a hurry? Place your cold whites in an airtight container and sit the container in a bowl with warm water. Swirl the container in the water for a couple minutes or until the whites no longer feel cold.

