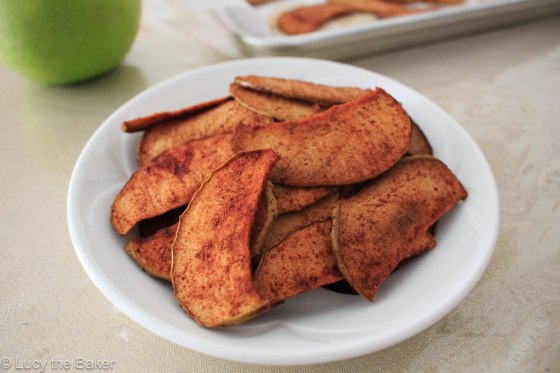
So far, I’ve been all about apples this fall. Besides the two awesome recipes I’ve posted thus far, this one is a favorite: the simple and delicious baked apple chip.
It all started years ago, when I bought a bag of apple chips that brought like, three in the bag. I loved them but was outraged by the fact that the bag was practically empty. As usual, I uttered an “I can probably make this myself but way better” and started planning. After I figured it out, I made so many and so often, I got sick of them. It’s been quite a minute but I decided to bring them back; for old time’s sake.
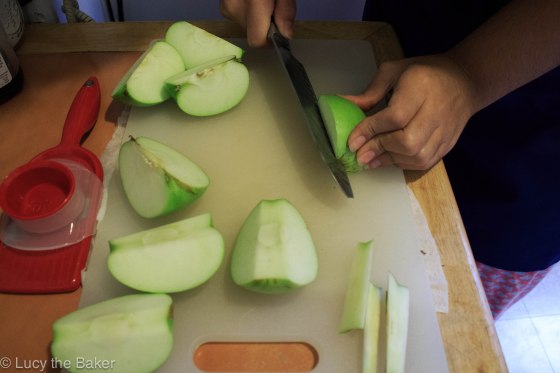
For apple chips, you don’t need many tools and they aren’t as fancy as you may think. First, you need your apples (obviously), a cutting board, and knife. You can use any apple you’d like but I’m very partial to the Granny Smith. For you lucky ducks who have a full sized mandoline, you can skip this step. I cut them so it’s easier for me to core and slice but if you have an apple corer, this is the time to use it. For those like me who don’t have a full sized mandoline, it’s time to cut the apples. I like quartering them to remove the core. That, and a quartered apple is easier to slice once cored.
Now that the apple is quartered, let’s core. Place an apple quarter on one of its flat sides. Introduce the knife to the apple at an angle (like maybe 45 degrees?) and slice out the core. Sounds weird to explain it like this, so I hope the pictures helped! Once that’s done, we can move on to slicing.
At this point, if you’ve got the knife skillz, you can do it by hand. I do not, so I use a hand mandoline. I call it the ‘handoline.’ Catchy, right? I love slicing with it because I get kind of uniform slices every time. I say ‘kind of’ because depending on the amount of force used when slicing, the end product can end up either too thick or thin. Speaking of which, if free handing, make sure they’re all about the same thickness. This is crucial to the apple chip’s chippyness. And for safety’s sake, use the hand guard. Yeah, I know I’m not using mine but do as I say and not as I do. SAFETY FIRST.
Now that all the apples are sliced, let’s talk toppings. If you’re a purist, you can lay them out on the baking sheet and bake them as is. I’m not, so I like topping mine with cinnamon sugar. I use about two tablespoons of sugar to 1/2-1 teaspoon of ground cinnamon per apple. The amount of cinnamon varies, depending on how festive I’m feeling. You can pretty much go either way here, and top them however you like. Toss the slices in the sugar and cinnamon, making sure they’re all somewhat coated. On prepped baking sheets (prepped = lined with parchment), lay out your slices carefully. Make sure they’re as close as possible without touching. This isn’t one of those recipes where you can get away with throwing everything on the pan all haphazardly. Take the time to line them up.
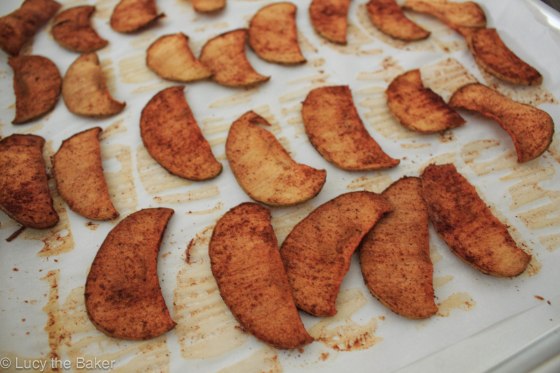
At this point, you should’ve had your oven preheating before you even started. For those keeping score, it’s at a whopping 250 degrees fahrenheit. I know what you’re thinking; “does my oven even go that low?” Yes it does! Believe me, I thought mine didn’t either. Now, place your apple soldiers into the oven and bake for AN HOUR AND A HALF. Why so long? Well, apple chips get their chipyness from being dehydrated in the oven. The low temperature and long bake time makes it so the dehydration is done carefully and evenly, so the apples hold their shape and are crisp when done. You really can’t crank the oven up with shorter times to speed up the process. It won’t work, and your apples will burn. Patience, grasshopper. You shall be rewarded.
Midway through baking, flip the slices over and rotate the pans in the oven. Also, watch the apples as they can burn if you don’t. Believe me, I know. After that painstaking hour and a half is over, it’s time for the slices to cool. This is also crucial because out of the oven, the slices are still floppy and not very chippy. We don’t want that. Let them sit on the baking sheet for at least 10 minutes, and watch your previously floppy apple crisp with delight. The apples turn into chips that still taste very much like apples, with a slight sweetness from the sugar and a hint of spiciness from the cinnamon. They are extremely addicting, so make a lot!

I’m glad I brought these back from the mental grave I dug them into. It reminded me of why I started making them (and also why I stopped). I can’t hate them though; they are the perfect snack.
- Makes about four cups
- 2 large apples (I love using Granny Smith)
- 1/4 cup granulated sugar
- 1-2 teaspoons ground cinnamon
- Preheat the oven to 250F. Line two baking sheets with parchment paper and set aside.
- On a cutting board, quarter and core the apples. If you have a full sized mandoline, feel free to core the apples (with a corer) before slicing. Or, you can slice them without coring.
- Once quartered and cored, begin slicing the apples. You may do so with a knife or with a hand mandoline (handoline!).
- Place the apple slices in a large bowl and sprinkle the cinnamon sugar. Gently toss the apples to evenly coat. Carefully place the apple slices on the prepped baking sheets as close as possible without touching.
- Bake the apple slices for an hour and a half, flipping the slices over and rotating the pans halfway through baking. The apples are done when they look a little wrinkly and are dry to the touch.
- Cool on a rack for at least 10 minutes before devouring. Any leftovers keep well in an airtight container for a couple of days.


