
Tis the season — for Girl Scout cookies! It’s that time of year again; when adorable little girls peddle their green boxes of awesome, in exchange for some cash for their troop. Many of you probably grew up with these cookies, or were even a Girl Scout! I did not.
I was born and raised in New York City, in a neighborhood all the way uptown. The Girl Scouts were something I only heard about on TV. I almost thought they were just some made up thing that didn’t exist, as I had never seen a Scout in real life. When I was in high school, I became aware of their existence through teachers, friends and the Internet. All everyone ever mentioned about the Girl Scouts were the cookies; the Thin Mints in particular. The way people talked about Thin Mints, I thought they were the only cookie they sold. After a little bit of my own research; because really, when someone mentions cookies or any kind of popular sweet treat, I NEED TO KNOW MORE. Anyway, I found that there were several different kinds and flavors of cookies. All of them sounded absolutely delicious, but sadness set in when I realized that there were never any being sold near me.
I didn’t get to taste a Girl Scout cookie until a couple of years ago. One of my mom’s friends somehow got a box of Samoas (or Caramel deLites) and offered us some. OH MY GOD, it was amazing. That was the first and last time I had a Girl Scout cookie. Sad, right? Well, no. I kept hearing about the cookies year after year but it never occurred to me that I could possibly make them myself. I saw a few knock offs online, and just decided to take the plunge. The only caveat was that I had to figure out how to make the cookie as close to dairy free as I possibly could.
I used this recipe as a guide. The shortbread cookie recipe was fantastically easy, so I didn’t change that. The caramel/coconut topping in the recipe was semi-homemade; using packaged caramels. I looked online for a homemade, dairy free replacement and just decided to sub the coconut milk for the heavy cream. This was both a good and bad idea. It was the first time I attempted that caramel candy recipe, as well as a coconut caramel so I had no idea what to expect or if it was even going to turn out. Despite the uncertainty, I think they came out pretty well.


The shortbread was really simple and easy. The dough comes together in a flash, and is easy to roll out; so long as it’s not too soft! The cookies held their shape pretty well after baking and didn’t crumble under the coconut caramel’s pressure. I used a biscuit cutter and the plastic cap off the soy milk container to make my cookies into the doughnut shape. It was fairly easy but a doughnut cutter is even easier if you own one. Once all the cookies were done, I moved on to the caramel.


For the caramel recipe, I went to TheKitchn. I’ve made caramel sauce before but since I needed a chewier consistency that held its shape; I had to get a new recipe. I followed it pretty much verbatim, except that I used full fat coconut milk in place of the heavy cream. Everything was going fabulously until I poured the caramel into a bowl. There was an oily film that rested on the caramel’s surface. I had heard of separation but I thought I’d get lucky. I didn’t but because I didn’t want to waste any ingredients, I tipped the bowl and got rid of the excess oil. It sounds gross but the caramel itself was still tasty!


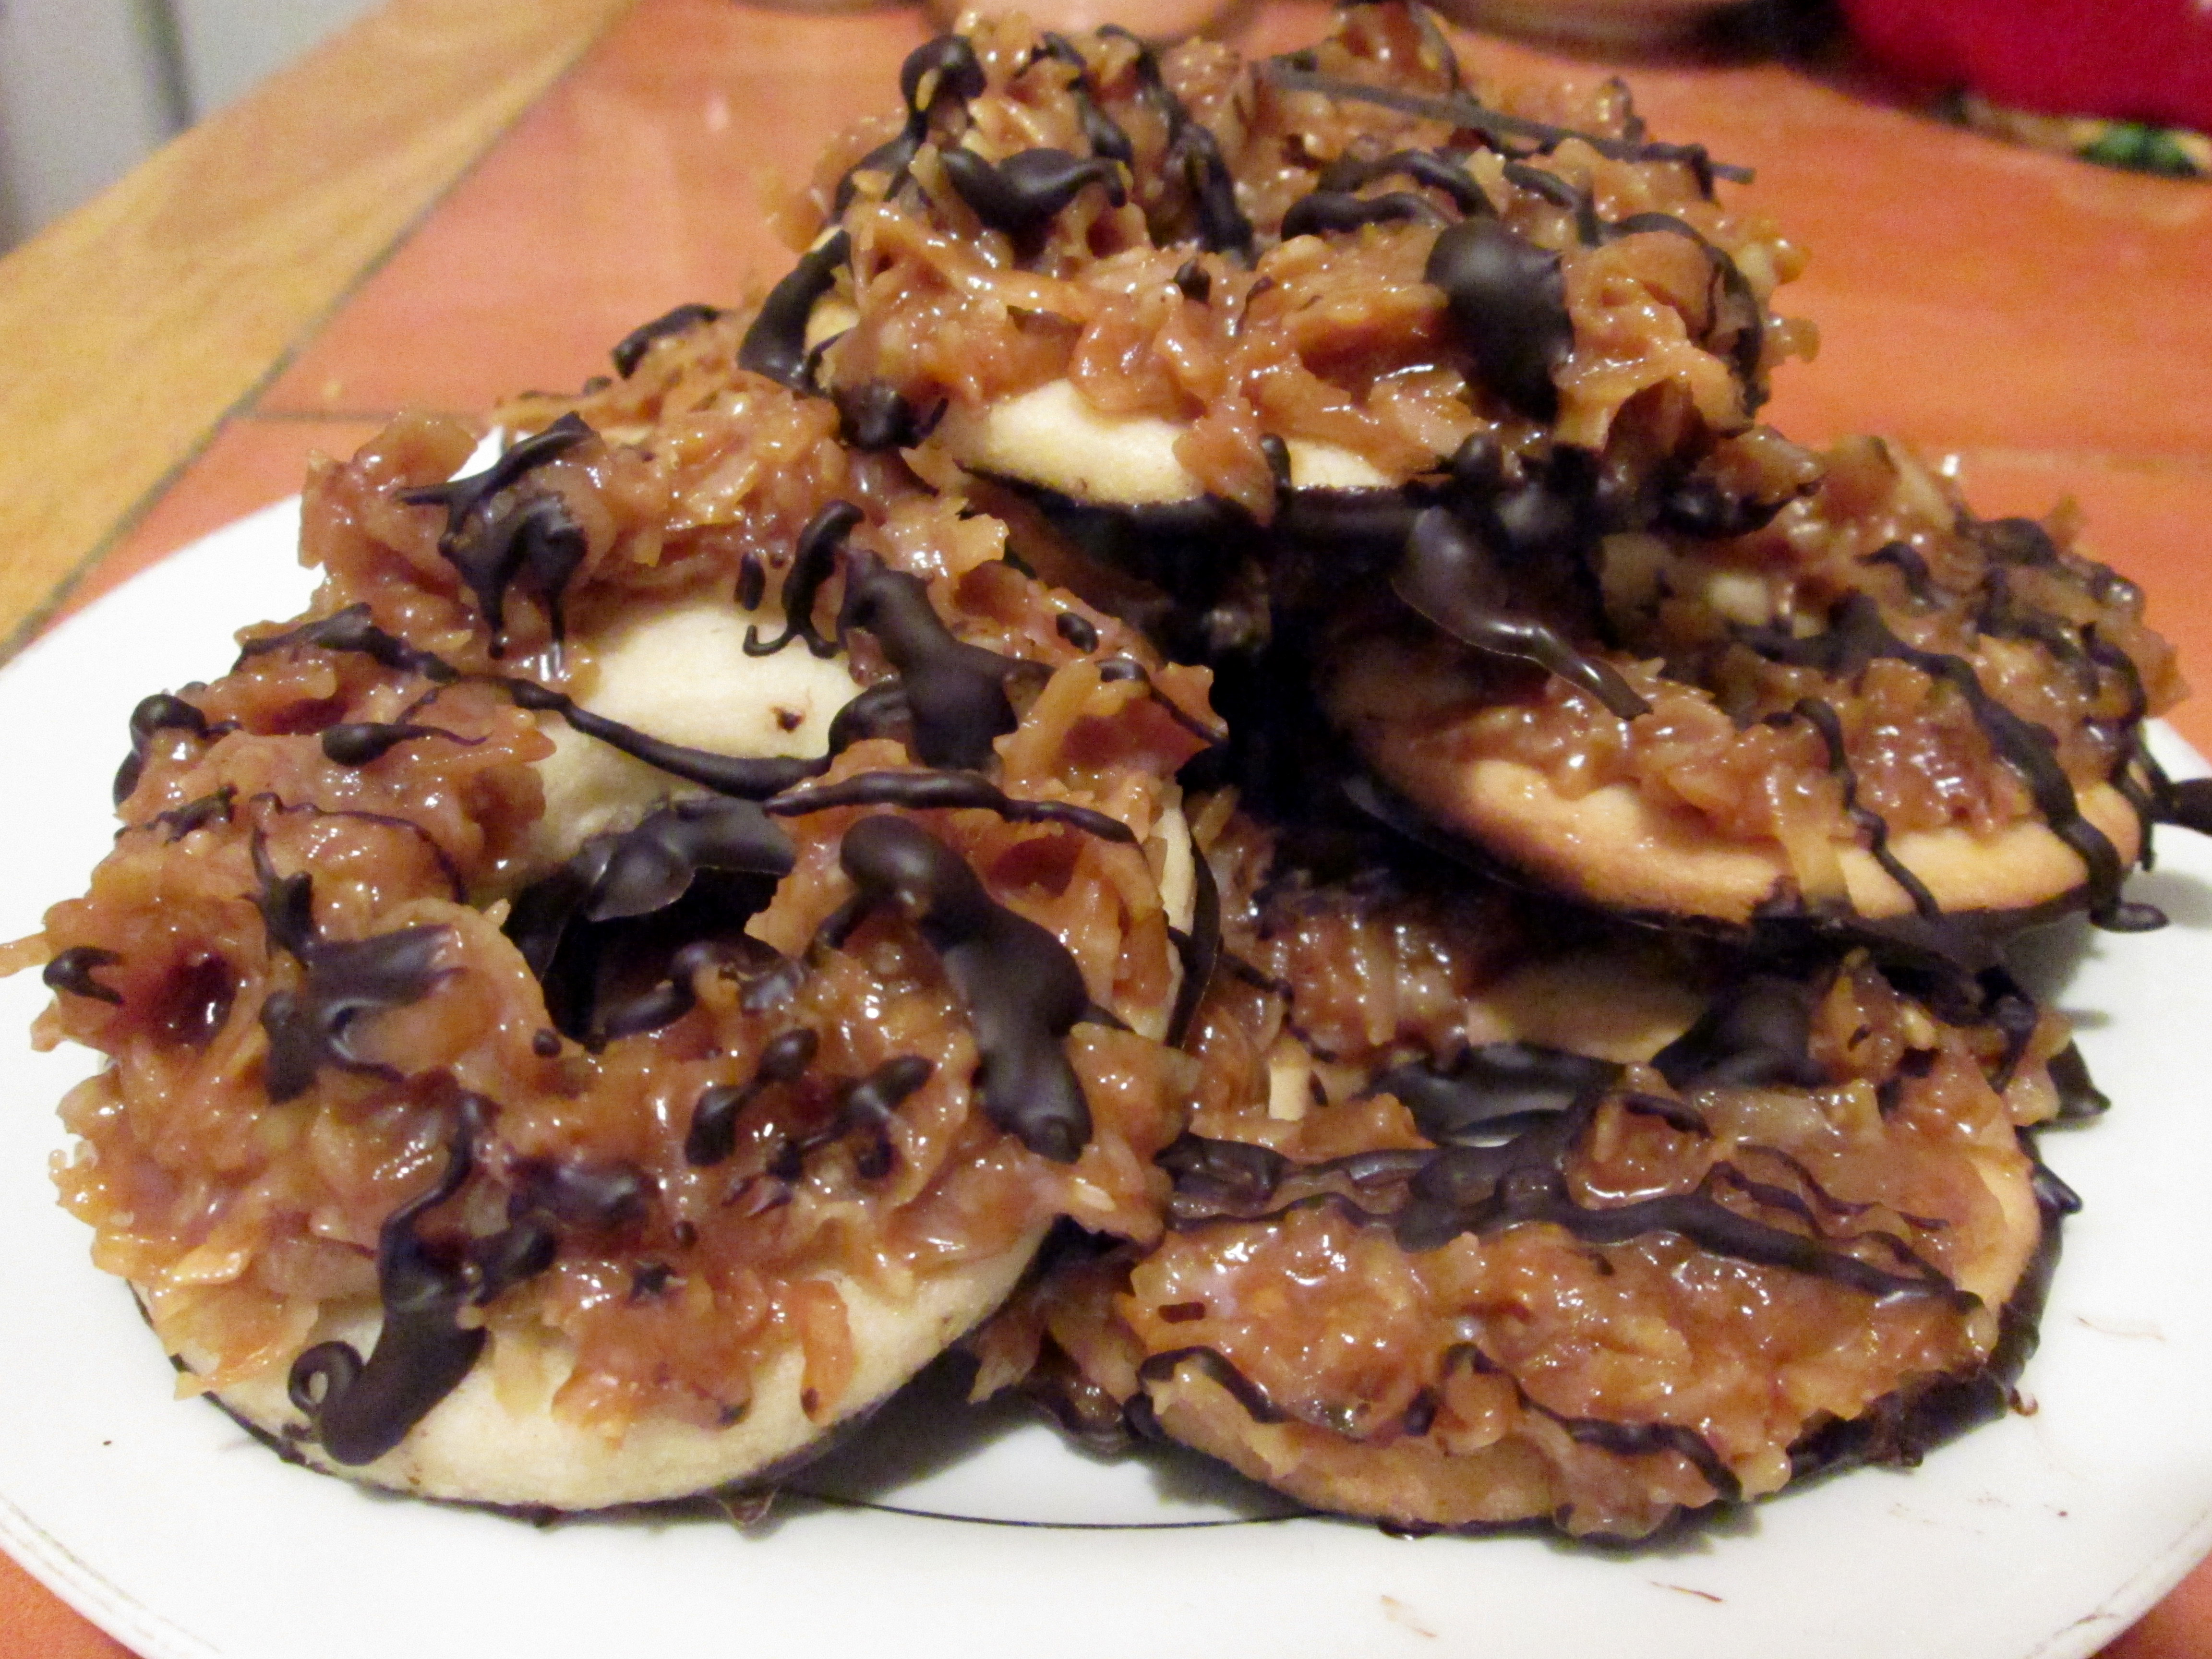
After that was ready, my sister and I assembled the cookies. I got more cookie bases than anticipated, so I left a few without any topping. My parents were pleased. After topping with coconut, we dipped a few in melted semisweet chocolate, and used the rest of the chocolate for the drizzle. Despite the fact that I forgot to toast the coconut, these cookies came out tasting amazing. The coconut flavor in the caramel gives that deep nutty taste. The cookie wasn’t overwhelmingly sweet and didn’t interfere with the coconut caramel. All together, the cookie is a crispy, chewy and extra coconutty. They may not look like the real Samoas but they are still fantastic. Even though there still aren’t any Girl Scouts near me, it’s good to know that I can still enjoy the season (and the cookies) at home!

Homemade Samoas – adapted from Just a Taste
Makes about 40 2-1/2″ cookies
For the cookies:
- 1 cup (2 sticks) unsalted butter, at room temperature
- 1/2 cup sugar
- 2 cups all-purpose flour
- 1/4 teaspoon baking powder
- 1/2 teaspoon salt
- 2 Tablespoons milk
- 1/2 teaspoon vanilla extract
Directions:
- Preheat the oven to 350ºF. In the bowl of a stand mixer fitted with the paddle attachment, or a medium sized bowl with a hand mixer; cream together the butter and sugar until light and fluffy.
- In a separate bowl, whisk together the flour, baking powder and salt. In three increments, add the flour mixture to the creamed butter, mixing between each addition and scraping down the sides of the bowl as necessary. Add the milk and vanilla extract, blending until combined and the dough begins to come together in large pieces.
- Use your hands to divide the dough in half, pressing it together to compact it into two disks. Wrap the disks securely in plastic wrap and refrigerate them until firm, about 1 hour.
- Once the dough has chilled, roll each disk out onto a lightly floured surface until it is 1/8-inch thick. Cut out as many cookies as possible using doughnut-shaped cookie cutter, or a circular cookie/biscuit cutter and a smaller cookie cutter (or the plastic cap off a carton of milk). Place the cut-out cookies on a Silpat or parchment paper-lined baking sheet and repeat with remaining dough.
- Bake the cookies for 10 to 12 minutes, rotating the baking sheet half-way through, until the cookies are pale golden brown. Transfer the cookies to a wire wrack to cool completely.
Coconut Caramel Topping – adapted from TheKitchn
- 1 1/3 cup full fat coconut milk
- 4 tablespoons unsalted butter
- 1/4 teaspoon salt
- 1 1/2 cup white granulated sugar
- 1/4 cup corn syrup
- 1/4 cup water
- 1/2 teaspoon vanilla extract
- 3 cups shredded coconut, toasted
Directions:
- Melt the butter in the coconut milk. Over medium heat, warm the cream, butter, and salt in the 2-quart saucepan until the butter melts. Remove from heat, but keep the pan close by. Make sure your coconut is toasted and set aside before you begin. NO MULTITASKING.
- Combine the sugar, corn syrup, and water. In the larger 4-quart saucepan, combine the sugar, corn syrup, and water. Stir until the sugar is evenly moistened and you form a thick grainy paste. Wipe down the sides of the pan with a damp pastry brush so there are no sugar crystals above the surface of the sugar mixture. Clip the instant-read thermometer to the side of the pan so that the heat sensor is immersed in the sugar. Do not stir the sugar after this point.
- Cook the sugar syrup. Place the pot with the sugar mixture over medium to medium-high heat. Let the sugar syrup come to a boil without stirring. At first, you will see small bubbles around the edge of the pan, which will eventually move inward. Around 250°F, the sugar syrup will turn transparent and boil rapidly. Around 320°F, the syrup will darken slightly and smell caramel-like. You can proceed to the next step any time after the syrup reaches 250°F and before it reaches 325°F.
- Whisk in the cream and butter (WEAR AN OVEN MITT WHILE STIRRING! The steam is REALLY hot). Turn off the heat under the sugar syrup. Slowly pour the warm cream and butter mixture into the sugar syrup while whisking the sugar syrup gently. The sugar syrup will bubble up and triple in size. Stop whisking once all the milk and butter mixture has been added.
- Heat the caramel to 245°F – 250°F. Return the pan to medium to medium-high heat. Let the caramel come to a boil without stirring. It will start off as a soft buttery yellow and eventually darken to reddish-brown caramel. Remove from heat when the caramel reaches 245°F to 250°F.
- Quickly whisk the vanilla into the caramel. Pour the caramel over the coconut and stir until coconut is completely coated.
Assembling the Samoas:
- about 8oz dark or semisweet chocolate, melted
- Melt the chocolate over a double boiler. Set aside.
- Carefully spread on a small amount of the coconut caramel on each cookie, taking care not to press down too hard onto the cookie. Continue until all the cookies are topped or until you run out of coconut caramel. If caramel is getting too hard to spread, you can try to reheat it a bit in the microwave to soften.
- Let set for about 15 minutes; the caramel should begin to harden pretty quickly. Dip each cookie bottom into the melted chocolate; scrape off some of the excess if desired. Place dipped cookies onto a baking sheet lined with wax paper. Repeat with all of the cookies.
- Drizzle the remaining chocolate over the cookies in a striped pattern. Original samoas have equally spaced and organized stripes. Feel free to freestyle your drizzle!
- Place in the fridge for 30-60 minutes, or until chocolate is set. Alternatively, you can leave them out to set at room temperature. To store the cookies, I’d recommend placing them in an airtight container at room temperature. You can also store them in the fridge but make sure they sit out for a couple minutes to soften before eating!
Lucy’s Tips:
- For a detailed explanation on how to make the caramel (with pictures!), please visit TheKitchn by clicking the link above.
- If you don’t have a lactose intolerant family member, use the packaged caramels or make the caramel using heavy cream.
- I also added 1/3 more coconut milk than the recipe asked for because I wanted the caramel to be soft and chewy instead of firm, like the original recipe describes. Up to 1/2 cup more cream/milk can be added to the caramel (1 1/2 cups of liquid total) but any more and it’ll become a caramel sauce. Not what you’re aiming for!
- Just to reiterate, please wear an oven mitt to stir in the milk (or cream) into the sugar syrup. The steam that comes off of the pot is ridiculously hot and you may burn yourself. PLEASE BE CAREFUL!
- I made over 40 cookies using a 2 1/2″ biscuit cutter. Sizes obviously vary, depending on the size of your cutter.
- USE WAX PAPER! For the love of God, use wax paper. I only had parchment and a few of the ones I dipped in chocolate got stuck to the parchment. When I finally lifted the cookie, almost all the chocolate stayed on the paper.
- Also, don’t forget to toast the darn coconut.

